Introduction to IPv6

ipv6

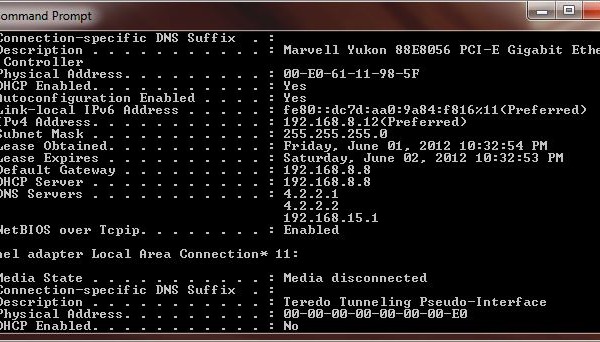
Internet Protocol version 6 (IPv6) is the next generation of the Internet Protocol that was designed to be the succeesor to the current Internet Protocol verion  4 (IPv4).  It was designed by the Internet Engineering Task Force (IETF) to deal with the exhaustion of IPv4 addresses.

An IPv6 address has 128 bits (2128 = a number too large for human comprehension) compared to an IPv4 address which has 32 bits (about 4.3 billion  unique addresses (232 = 4,294,967,296).  IPv6 address is too long; it is quite difficult to handle considering the fact that we are having  problem communicating IPv4 address to other people.

IPv4 has the simple form of four octets or groups of decimal  numbers seperated by periods: 1.2.3.4.  Now try and imaging if we keep that same format for IPv6 address; we’d have: 1.2.3.4.5.6.7.8.9.10.11.12.13.14.15.16 –  it would be way to long and too difficult to remember.  So our friends at the IETF decided to shorten it by breaking the IPv6 address into eight  16-bit  groups and switched to Hexadecimal numbering scheme with each group separated by a colon.  So a  typical IPv6 address now looks like this:

2000:F53A:0000:0000:0F14:0000:0000:0053.

Even with that, it’s still way too long so they decided shorten it further by removing the leading zero’s.  The aforementioned address could be represented  as: 2000:F53A:0:0:F14:0:0:53.  As you can see here, all the leading zero’s are removed and if any group of number has four 0’s, it’s replaced by a single 0.   If that isn’t confusing enough, IETF decided that they want to shorten IPv6 address further by replacing two or more consecutive groups of 0000’s (or 0:0 for  the short form) with a “::” leaving just the double colons between the groups.  So the same IPv6 address above can be represented as 2000:F53A::F14:0:0:53.   If you haven’t recognized it yet, we replaced “0000:0000:” with “:” right after F53A leaving “::” between F53A and F14.

Now you might question why the second consecutive groups of 0000’s didn’t get replaced; that’s because the our friends also said that you can only replace one  consecutive groups of zero’s and it’s gotta be the first occurence in the event that the two groups are of equal length.  The reason they do that is to  guarantee that we can reproduce the fully expanded address correctly.

To demonstrate that point, let’s the the same address above and modify it a little bit: 2000:0000:0000:0000:0F14:0000:0000:0053.  Now if we remove the  consecutive groups of zero’s, we’d have: 2000::F14::53.  Without the rule above, we can’t correctly reproduce the original address.  Let’s break it down:
By looking at 2000::F14::53 we know that we have three groups of and need five more to form a complete IPv6 address.  But do we put two groups of 0000’s  or three groups of 0000’s at the first occurrence of the “::”?  So to remove this ambiguity, the rule states that we can only have a single “::” in  any IPv6 address.

To summarize, IPv6 is the next generation of IP address; it is 128 bit long and resulting a really large address space – we won’t be running out of address for quite some time to come.  IPv6 address can be written in various formats with leading zero’s can be removed from each octet.

If you want to experiment with various ways to represent IPv6 format or to subnet it, check out this site.

Pinging Windows Server 2008

Windows Firewall
Windows Firewall

Enabling File and Printer Sharing (Echo Request - ICMPv4-In)

One of the most common ways for an administrator to see if a particular server is up or not is to send an ICMP packet to the server or in orther words, to ping it.  This is also known as sending an Echo Request to the server.

As Microsoft tightens security on Windows Server 2008, they have the built-in Windows Firewall blocking ICMP requests by default.  We have a couple of options to unblock this or enable the ping request and reply.  Here’s how you can turn this on using the MMC [Read more…]

Programmatically Ping a Networked Device

I would say Ping is one of the most popular methods used to troubleshoot network issue. When a networked device or server goes down, one of the first things a network engineer or a system admininistrator do is try to ping it and see if it can be reached.

This blog will show you two ways to ping a device so you can integrate the ping feature into your own application.

The first and easiest way to issue a ping command is to call the Ping method in the My.Computer.Network class:

If my.Computer.Network.Ping("www.google.com") Then
MsgBox("device up")
Else
MsgBox("device down")
End If

The drawback of this method is that it only gives you a boolean as the result to indicate whether the device is up or down. It doesn’t provide any other details like RTT, TTL or any error code for that matter.

The second way is to call the Ping.Send() method in the System.Net.NetworkInformation namespace which returns a PingReply object through which you could get more detailed information about the ping reply:

Dim myPing As New System.Net.NetworkInformation.Ping
Dim PR As System.Net.NetworkInformation.PingReply
PR = myPing.Send("www.yahoo.com")
If PR.Status = IPStatus.Success Then
MsgBox("Reply from " & PR.Address.ToString & ": BYTES=" & PR.Buffer.Length & " TIME<" & PR.RoundtripTime & "ms TTL=" & PR.Options.Ttl) Else MsgBox(PR.Status.ToString) End If

There you have it. Two ways of pinging a networked device. If you just need to check and see if a device is up or down, the first method might do just fine; however, if you need to gather some other statistics then obviously, the second one is the better choice.

I recommend that you read up on the PingReply object to get more information from the ping reply. If you wanted to implement some sort of Ping functionality as in Pinkie's then that's the way to go.

Know Your TFTP Server

From the previous blog, What is a TFTP Server?, we know that a TFTP is a file transfer protocol, running on UDP port 69 and typically used to transfer files to/from network devices. Now let’s take another look at TFTP and learn what to look for in a TFTP Server.

TFTP was first drafted in the early 1980’s in RFC 783 which specified a 16 bit Block number with 512 bytes or octets per data packet. As the result, the maximum file transfer using TFTP is 32MB’s. That was sufficient in the 80’s when it was proposed but as computing grown and technology advanced, 32MB’s became insufficient so in the 90’s a host of RFC’s were proposed and revised the TFTP Protocol to its current standard.

The latest of the TFTP related RFCs includes RFC 2347 (TFTP Option Extension) which provided the flexibility to negiotiate additional optional parameters and extends the capability of the orginal RFC and yet still be compatible with legacy software and/or devices implemented the earlier RFCs. It paved the way for others like RFC 2347 (TFTP Block Size Option) & RFC 2348 (TFTP Block Size Option).

RFC 2348 – TFTP Blocksize Option: Blocksize Option allows for the negotiation of the block size value to be in the range of 8 to 65,464 octets instead of the fixed 512 octets and extends the file size from 32MB’s to about 4GB’s (65,636 x 65,464).

RFC 2349 – TFTP Timeout Interval & Transfer Size Options: Timeout Interval Option specifies the amount of time a server will wait for an acknoledgement packet (Option Acknowledgement or OACK) before resend the previous packet. Transfer Size Option lets the receiving device knows how big the file is before the transmitting it. This is done to conserve bandwidth by making sure the receiving end can store the incoming data instead of blindly transmitting the data until the receiving end chokes on it. Some software like Pinkie also takes advantage of this option to calculate and report the progress of the file transfer thus providing a more responsive User Interface.

So in summary, when choosing your TFTP Server, you should choose one that can support Option Extension, Blocksize Option as well as Timeout Interval & Transfer Size Options. This can help you avoid potential issues when transferring firmware to network devices; especially to high end Cisco switches whose firmware tend to be larger than most others.

As a network tool, Pinkie has a multithreaded TFTP Server built-in and implemented all of the aforementioned RFC’s. It also does so in a unique One Window, One App architecture that can help reduce the desktop clutter, cut down the number of application you have to maintain and update. If you haven’t done so already, download Pinkie and try it out.

Further Readings:
RFC 783
RFC 1350
RFC 1782
RFC 1783
RFC 1784
RFC 1785
RFC 2347
RFC 2348
RFC 2349